Working with very large and extensive Microsoft Word documents is not always easy, especially when trying to make such a large document functional. When you are creating something that has many pages and a lot of information, it is sometimes hard to organize such files in a way that is easy to follow and understand. Writing a very extensive research paper or putting together an annual progress report for a company are good examples.
MS Word, thankfully, offers some features that can help with organizing such massive documents. One example is the Master Document feature.
A Master Document is more of a container or folder that holds a set of subdocuments within it. While the Master Document gives off the appearance of one large document, the subdocuments are actually individual documents that can be edited independently.
It is a fantastic tool to use when trying to organize a file that is extremely long and contains a lot of data. It gives you a versatile and easier option for managing long documents by allowing you to edit subdocuments individually or work on the Master Document as a whole if need be.
Why work with a Master Document?
There are many advantages that come with working with a Master Document. Here are some of the most obvious ones.
- It allows you to move easily from location to location within multiple documents.
- You can see all of the latest changes that were made without having to open every file individually.
- Cross-referencing documents is much easier.
- You can organize your documents like a book with indexes, a table of contents, footers, headers, etc.
- You can print multiple documents at once without having to open them all individually.
How to create a Master Document
There are different ways to go about creating a Master Document. You could start from scratch, convert an existing document into a Master Document, or combine several existing documents into one Master Document.
No matter what method you are using, you are going to be creating the Master Document in Outline view. The Outline Toolbar allows you to easily create, add and arrange your subdocuments.
Creating one from scratch and converting an existing document to a Master document is pretty self-explanatory, but creating a Master Document by inserting existing Word files is a bit more detailed of a process. Here’s how you do it.
Once you have created a new document, click on the View tab.
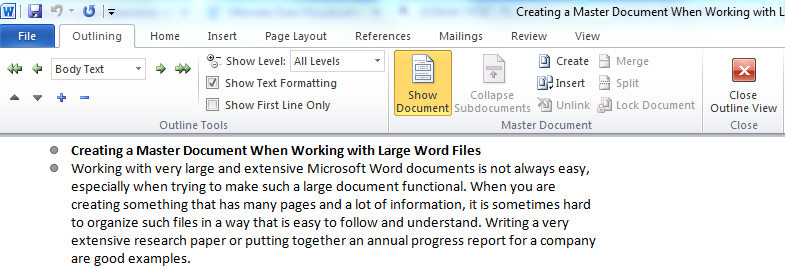
Now click on the Outline button. Once you have done this, the Outline tab will appear.
Click on the Show Document button. This will provide you with insert options.
Now you can add subdocuments to your Master Document. If you have already added some subdocuments, make sure that the Show/Hide option is on so that you can see where you are placing your insertion points. This is necessary so that you don’t place one subdocument into another, which would give you a sub-subdocument (unless you specifically want to do that).
Click on the Insert button located on the Outlining ribbon bar and then select the document that you want to add to your Master Document.
Word will now add this document, but the original name so that you can identify it easily.
Working with a Master Document gives you a huge amount of options for completely customizing your document in order to organize it according to your personal preferences. You can choose page layouts, margins, header and footer options, insert page numbers, a table of contents, a navigation pane and many other options. Of course, the Master Document can also be secured by password protection so that no one will be able to edit it without your permission.


