Styles and Themes are among Microsoft Word’s most amazing features. They make your documents look neat and professional, and you don’t need to invest much time in editing them. There is a huge set of already predefined themes in Word 2013, which you can access from the Designs tab. If you don’t want your document to be too colorful, you can always change the colors using the nearby button Colors.

Adjusting themes and styles can come handy in a situation when you want to convert a document, maybe a scanned one, and you want to make some fast post-conversion adjustments.
Modifying a style
Open the Home button.
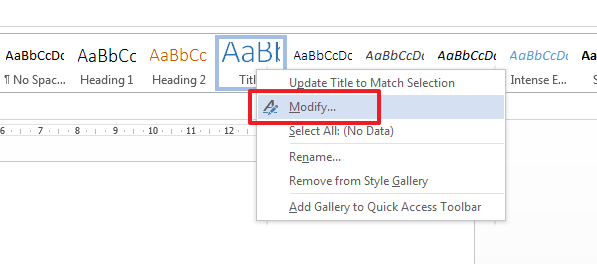
Select the style you want to modify and click the right mouse button. Select the command Modify by clicking on it. In this example we will change the style of the Title.
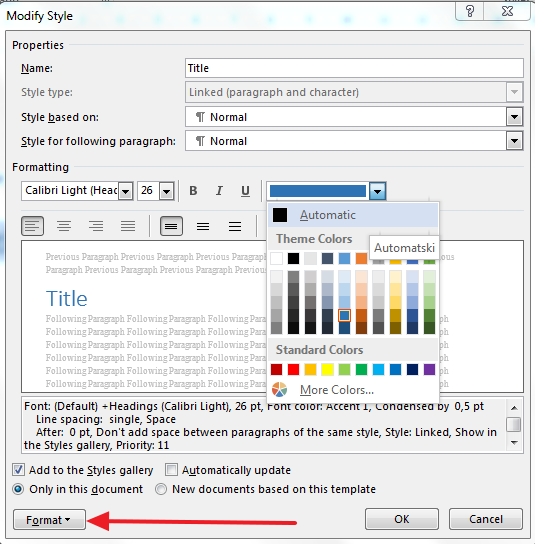
Now go to Format in the lower left-hand corner and select which parameter you want to change: font, paragraph, tabs, border, language, etc. In our example we will change the color of the tile. Feel free to explore your options.
Creating a new style
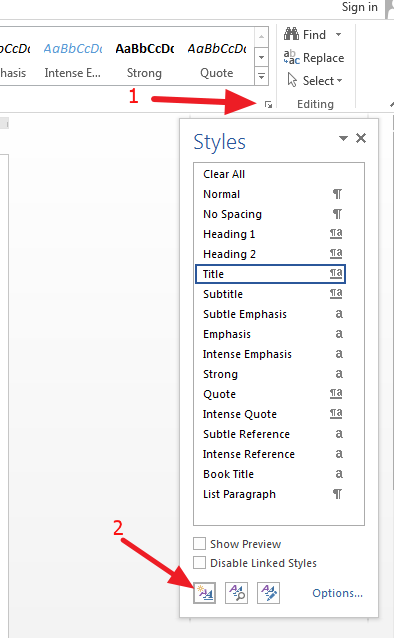
If you don’t like the current set of styles, you can always add a new one. You don’t have to modify existing ones. Simply click on the small arrow in the Home tab, below Styles.
Now scroll to the bottom and click on New Style.
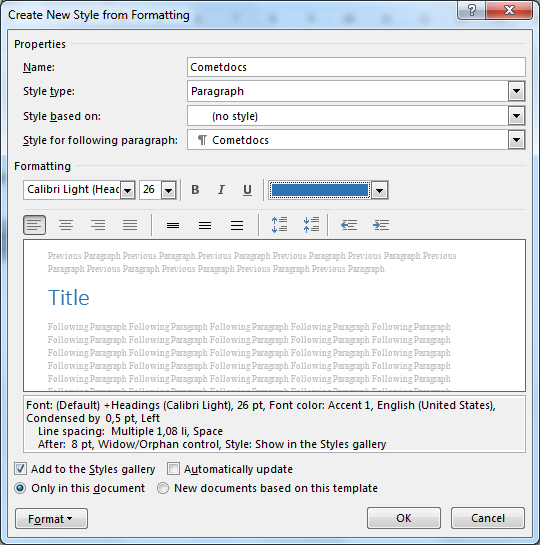
Enter all the details you want and the new style will be ready. Don’t forget to add it to the Quick Style list if you plan to use it frequently.
Automatically Updating Styles
To have Word automatically reset the selected style whenever you apply some manual formatting to any paragraph that uses this style, just make sure to select Automatic Update whenever you make changes. Also, you can choose whether you want this to be valid only for the current or for any future document. We advise you to be careful with this feature.

Note that this is not valid for the Normal style.


