One of the great things about Microsoft Office 365 is that it brings cloud computing into the forefront more than ever before. When using any of the Office 365 programs, you are able to choose whether you want to work online or offline.
For example, when writing something in Word 365, connecting to your Microsoft account will give you a huge number of opportunities to not only perfect your document, but also share it easily and collaborate with others.
The spell check options in Office 365 are especially nice. The best thing about editing online is that users now have the option of spell checking their documents very accurately, no matter what language they are writing in.
Once you log in to your Microsoft account and open a new document, you will see the language bar at the bottom of the page. You can either set that to the language of your choice right away, or you can create your document first.
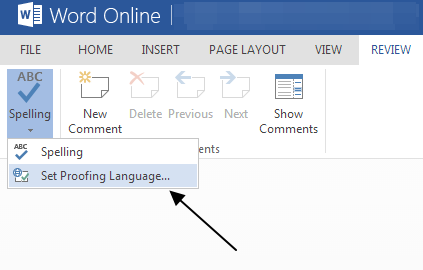
If you are done writing and are ready to spell check your work, click on the “REVIEW” tab and then click on “Spelling.”
You will then be given the option to “Select Proofing Language…”
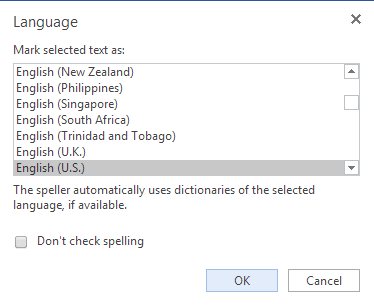
Now you can select the language you need.
Once you have selected the language that you are writing in, Office 365 automatically references an online spell checker for that language so that you can make sure you haven’t made any glaring errors in spelling and general grammar.
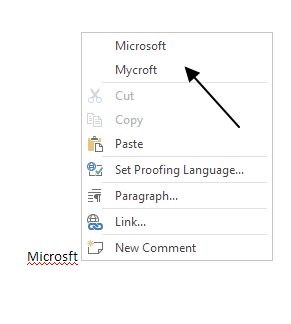
As you can see, all of the misspelled words that you have will be underlined with a red squiggly line.
Just right click on the underlined word to get a list of recommended spellings for that word.